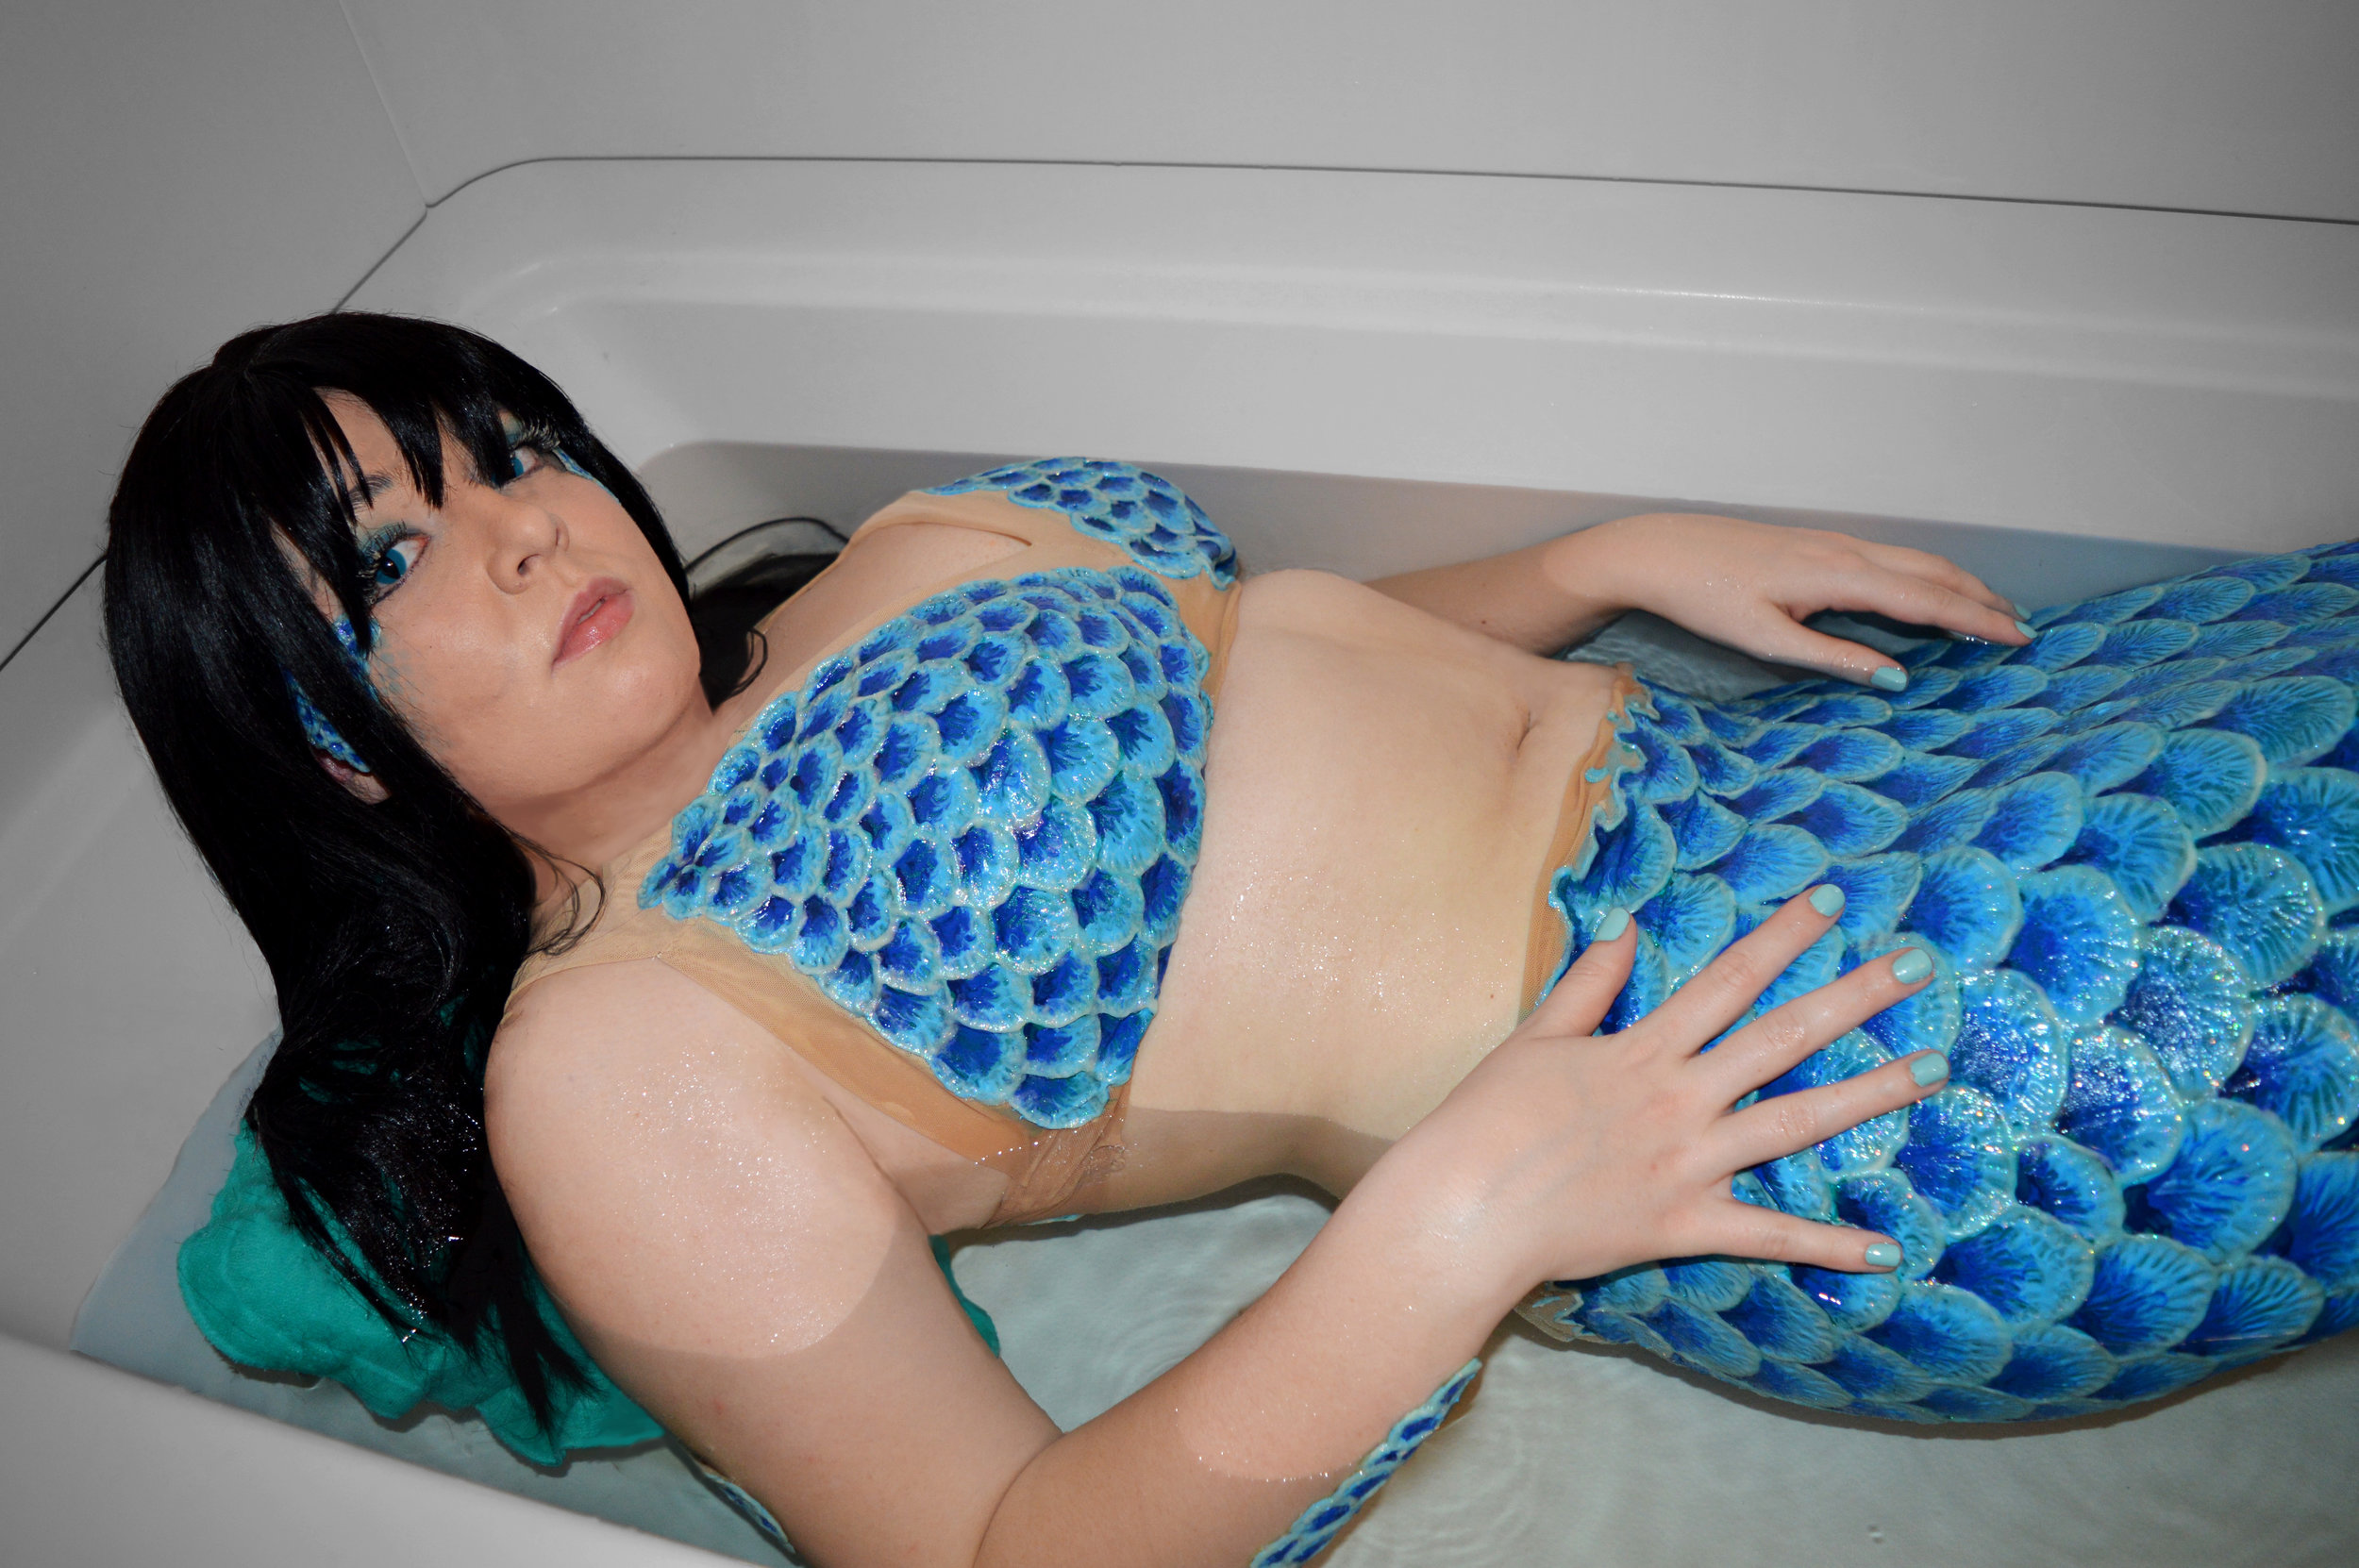
walkthrough of sapphire tail (puffy-paint, neoprene, spandex, and craft foam)
Here is the process for how I created my blue tail. I really wanted something with 3D scales but have no space/money for silicon. After some research and a good deal of test swatches I settled on making the main body of my tail out of neoprene and puffy paint (the fluke is spandex and I have a band of power-mesh around the top due to the design of the tail).
I have taken this tail out and about on dry land in my wheelchair (that I desperately need to decorate). and I have had it in tubs as well as pools. It has held up with no pealing and minimal cracking around joints.
I ordered my neoprene from "Seattle Fabrics". The all other supplies came from Jo-Anns. My mono fin is the "fin-Fun" by Finis.
{because I want everyone to have the credit they deserve I got the idea to use puffy paint from another mermaid.
the techniques I developed and the construction are my own.
The tail was for a cosplay of Fem! Mermaid Haru. The original character belongs to "Free!". The gender bent design belongs to me}
step 1: creating the tail
I measured out my pattern and cut everything out. then was able to sew through the neoprene with a Jeans Needle on my sewing machine. I tested this out and made alterations then sewed the fluke fabric to it. the mono-fin was inserted and the end sewn shut. ( I had an extra of the old style fin funs, so I'm not planing on removing this.) It is held up at the top with a drawstring through the neoprene section, and elastic through the power mesh. the elastic is just to help the mesh stand, does nothing to keep the body of the tail in place.
later realized the inside of the fluke needed reinforcing. I tested, and craft foam holds up just fine in water.
so I created a sleeve for the ends of the mono-fin that extends out to the tips of my fluke. Thus the tips are still floppy but there is not a harsh line from the end of the fin.
I made the sleeve by tracing pieces of craft foam, glueing the edges together, slipping it on, and sewing the ends shut again.
step 2: outlining the scales
I stuffed the tail with the massive pile of grocery bags we keep (knew there was a good reason I had not recycled them yet.)
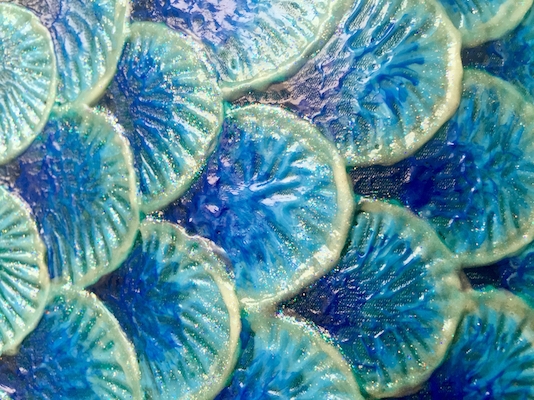
then I created 3 scale templates. one small, one medium, one large. I worked form the bottom to the top starting with the small. The best way to keep all my scales lined up was to start each row in the middle, and work outward along each side. If I started from the sides the rows got crooked. I used a thick line of my light blue puffy paint for this, to start to give the scales dimension.
I worked on and off on the front for about a month, and then powered through the back in around a week.
step 3: filling in the scales
the process of one row of scales
once all of the outlining was done it was time to get pretty!
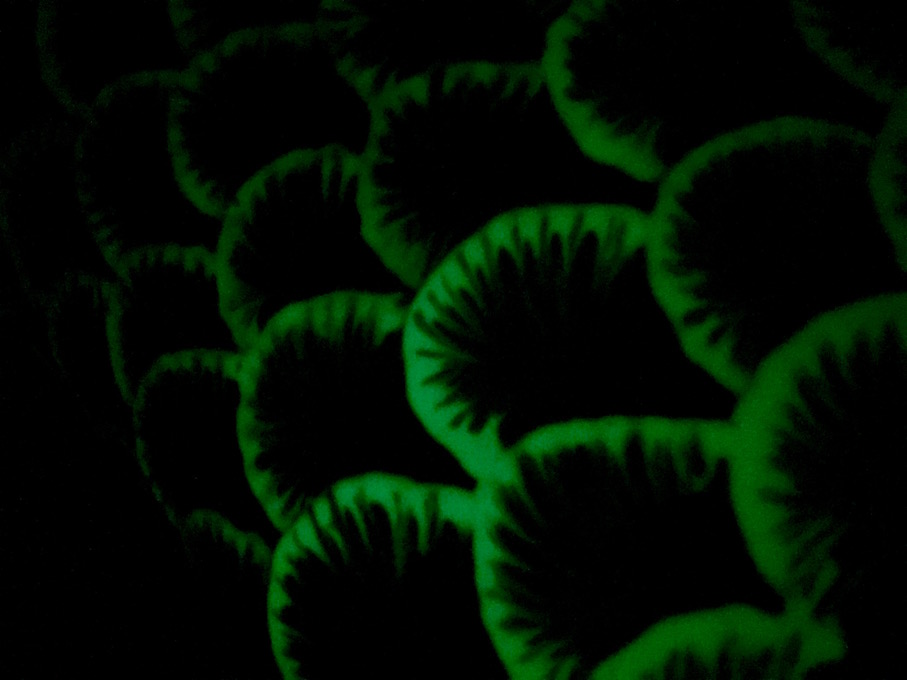
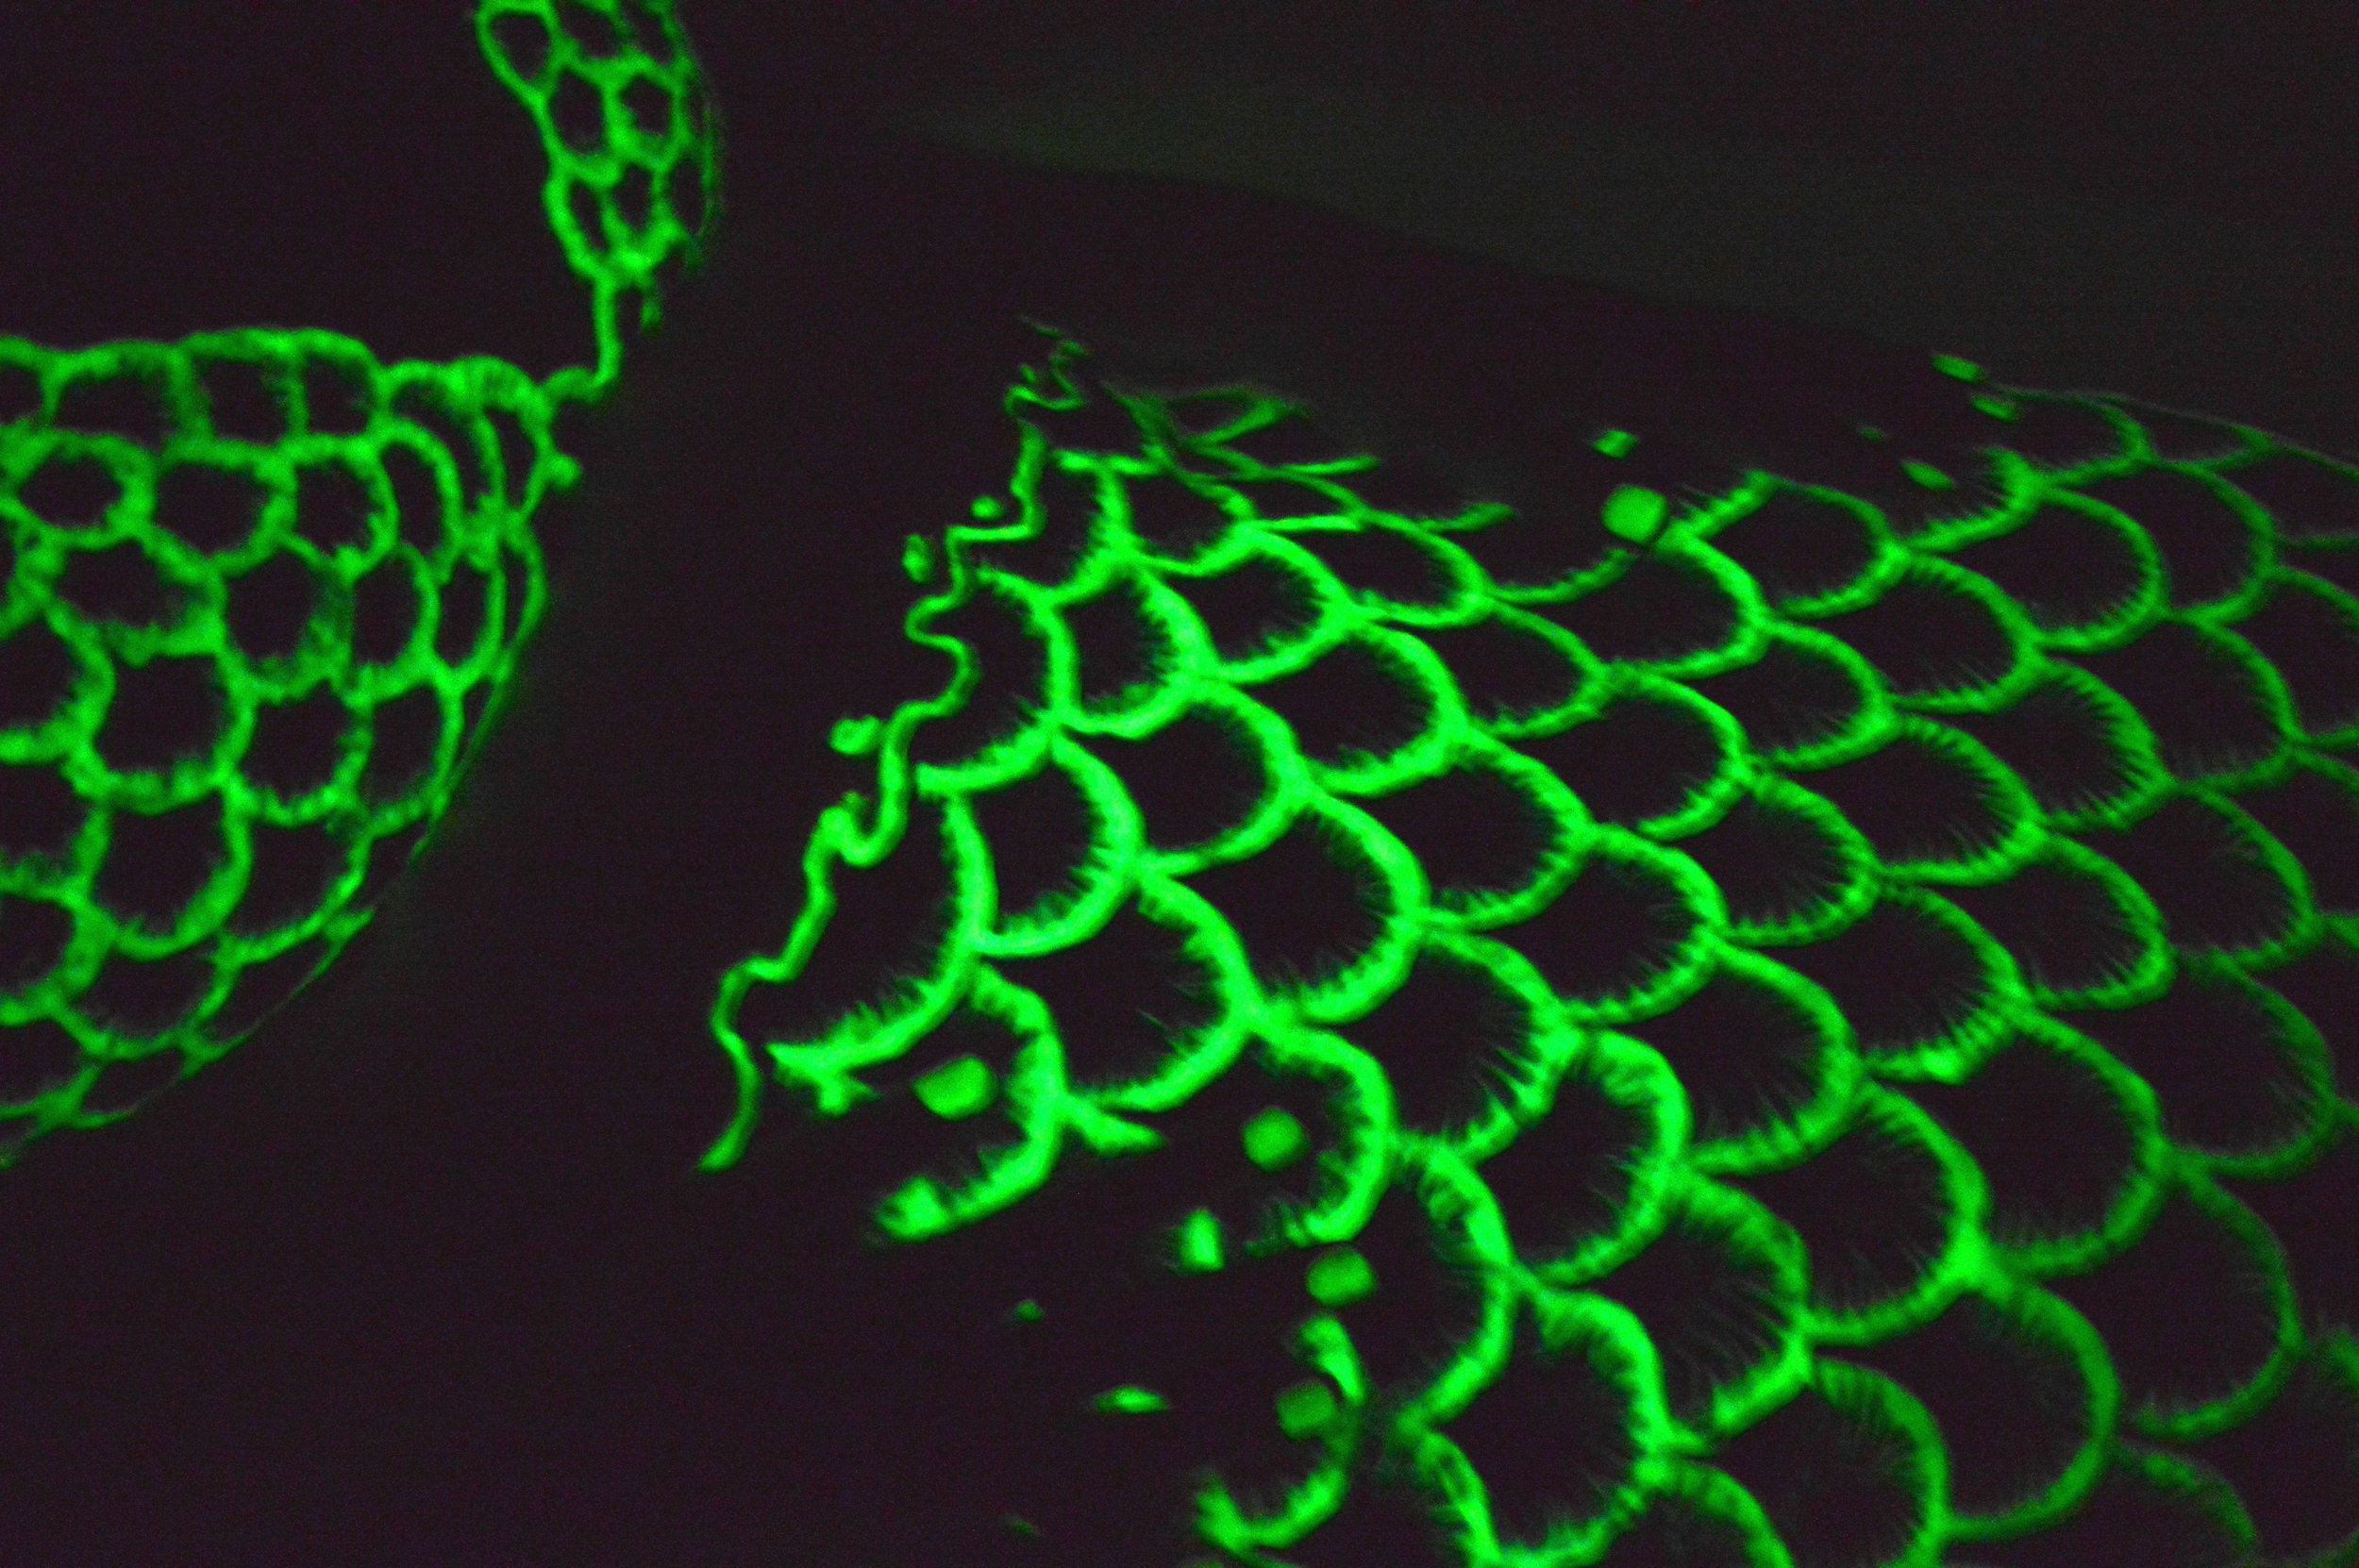
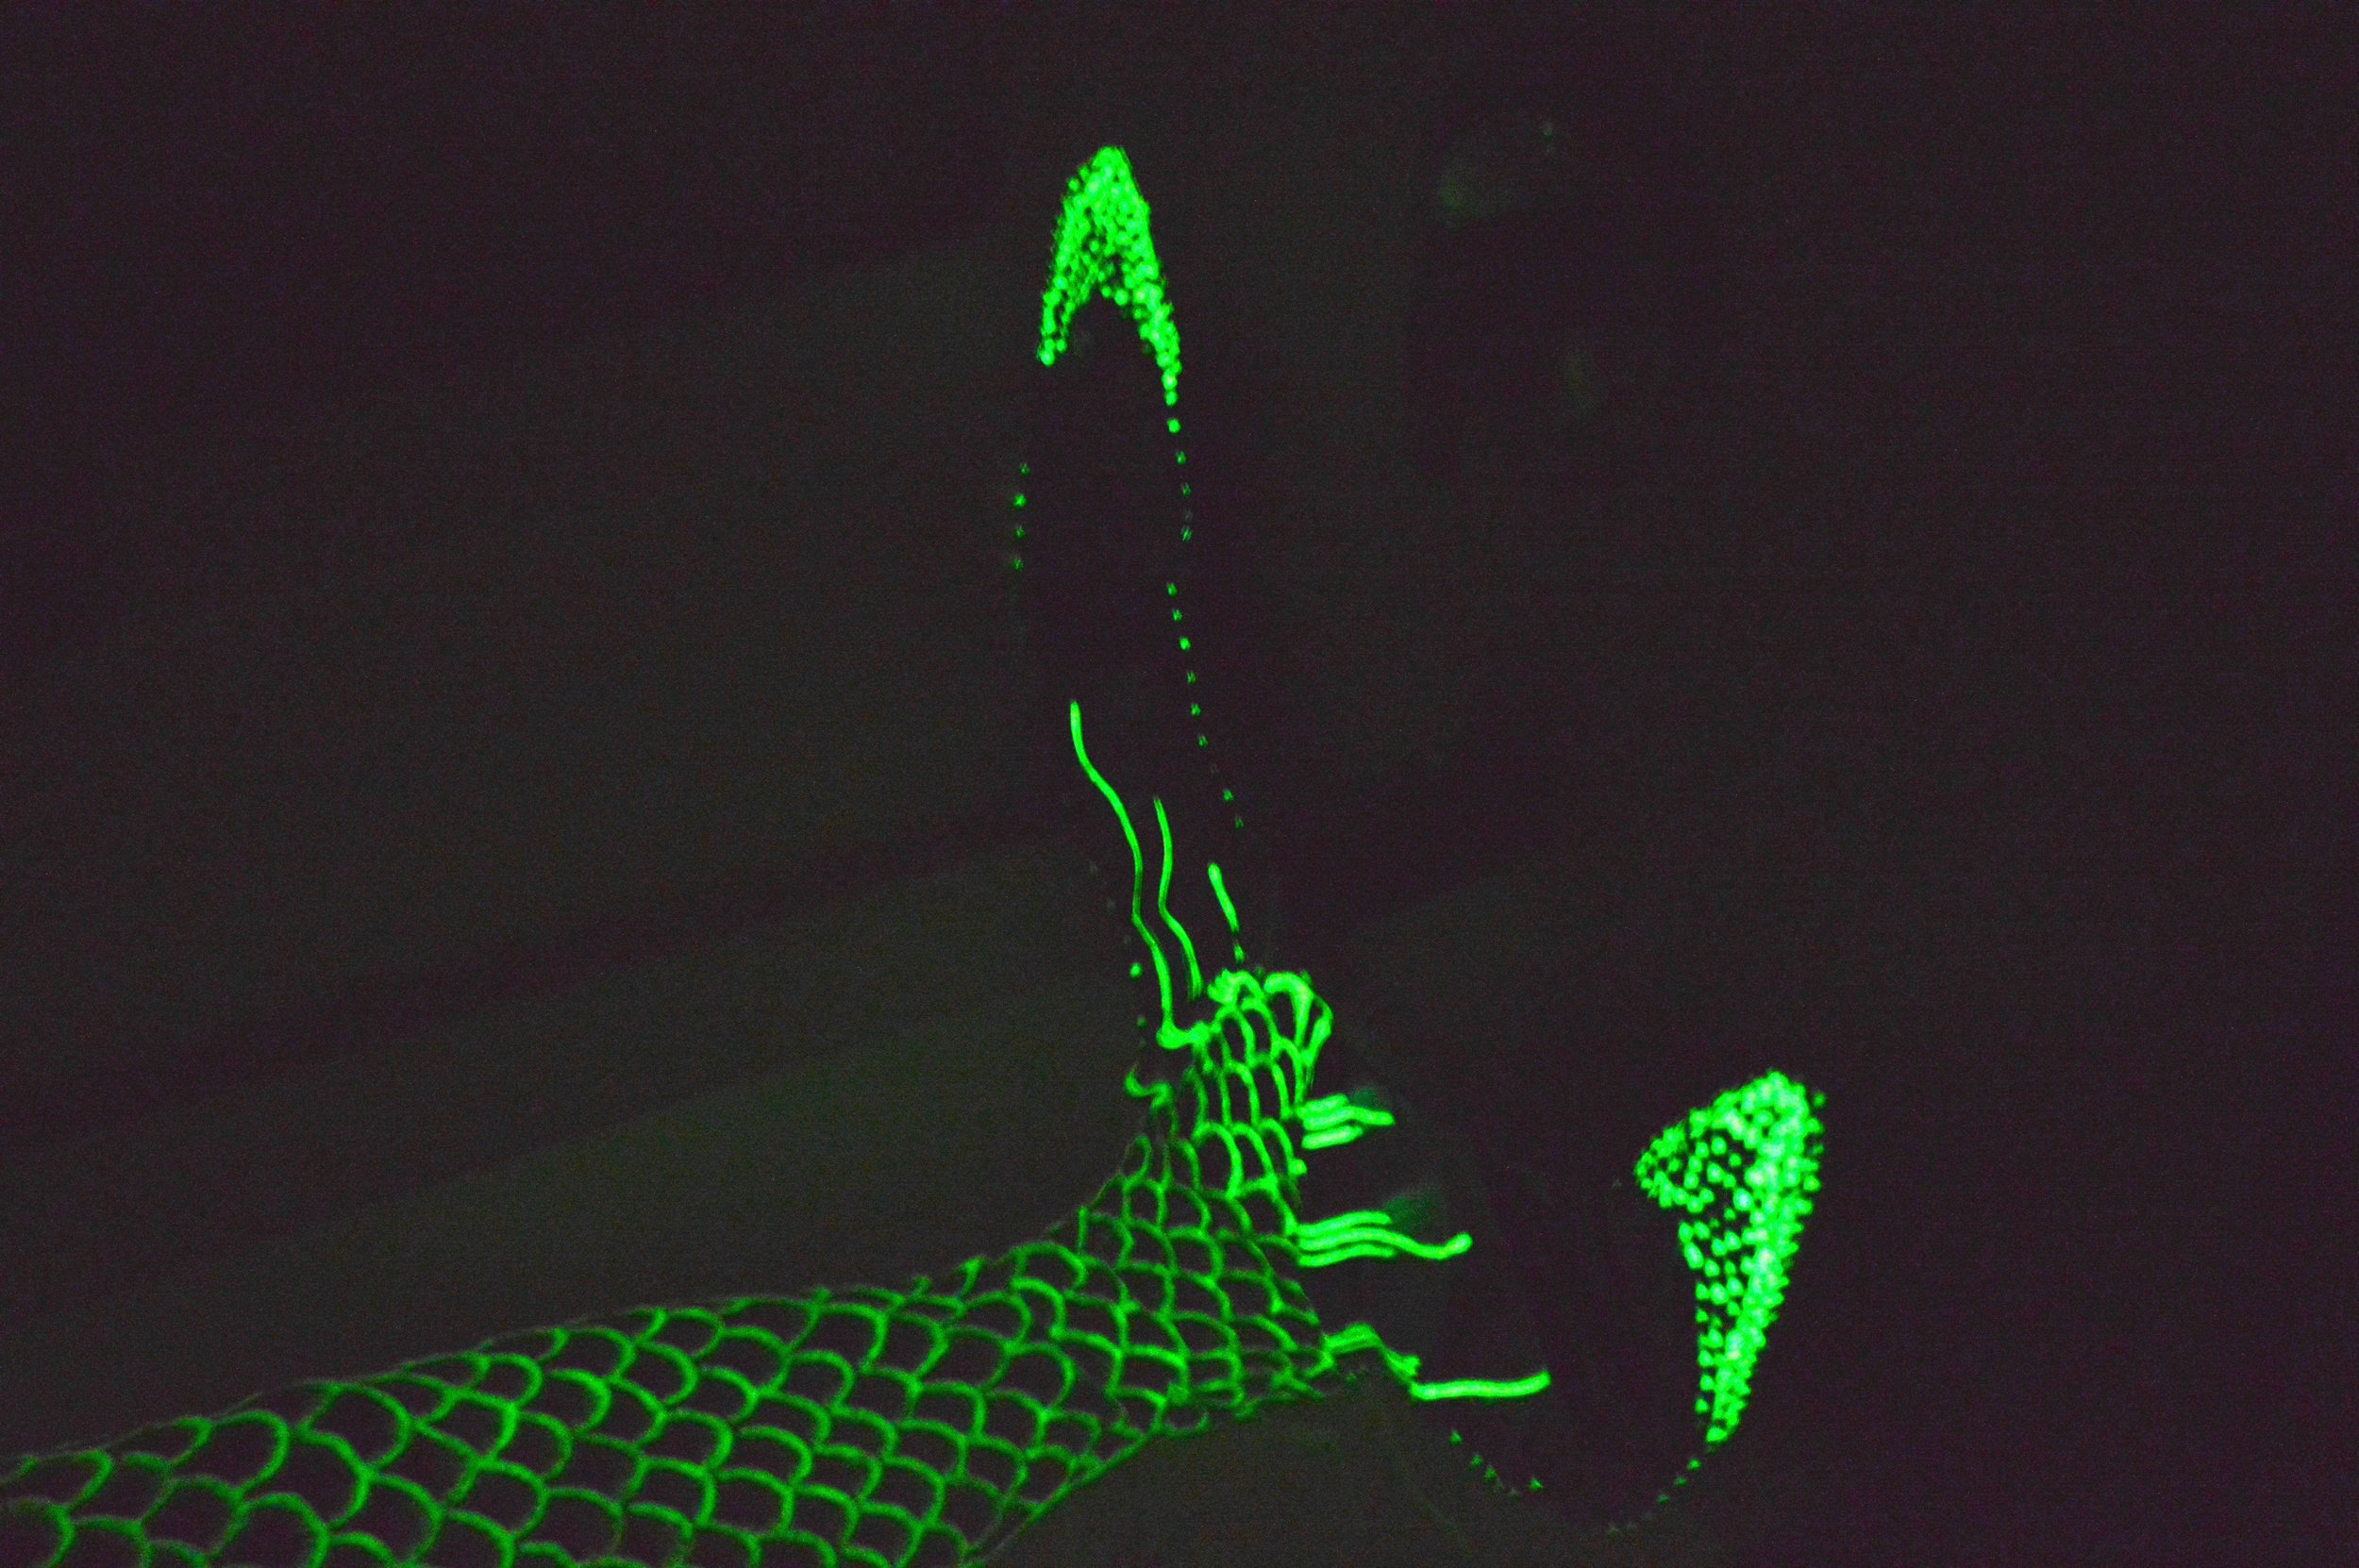
I used teal acrylic paint and 4 colors of puffy paint. I would "prep" the area with the teal paint and let that dry. this gave me one solid color palette to work with and helped the puffy paint adhere better to the neoprene. then I started with dark blue at the joint between scales, medium blue i front of that, light blue for most of the work, and glow-in-the-dark blue for the edges. I blended out the dark blue and blended inward the glow blue in streaks, mostly cause I liked the effect best on the test swatches. I would recommend really cheep paintbrushes for the blending, cause they will never be the same.
progress over the whole tail
This honestly took the most time. On average 4 rows of scales would take me an hour. but I did this mainly over winter break, so I could (and did) work on it all day every day.
I ended up using a lot more paint than I had anticipated, and probably spent over 90 dollars on paint by the end, and that is with coupons. I would estimate I used 9 bottles of the light blue (partly due to the outline), 3 bottles dark, 4 bottles medium, and 6 bottles glow. I did not use the whole thing of teal acrylic paint though.
step 4: detailing
once the whole thing was done... I decided it needed more!!!!!!
so I bought two bottles of plain white glow-in-the-dark puffy paint and two clear sparkly puffy paint. I applied the glow first with a paintbrush just around the middle part of each scale and then after that had dried i put the sparkles over the whole edge.
I also took this time to fill in any gaps that had been missed on the scales.
and I did a little more to the fluke, dotting the ends with puffy paint, starting with the lighter at the edges and moving slightly darker awards the middle, then covering it all in sparkles.
step 5: enjoy!